SSH Socks Proxying for Pentesting
Hello! So, when you’re doing penetration testing, a lot of times you’ll find that the apps you’re testing are tucked away behind firewalls or accessible only within the company’s internal network. That’s all well and good for security, but it can be a headache when you need to let the client know your testing traffic is legit. Usually, you just give them your company’s IP addresses, and they whitelist them.
But what if your company’s IPs suddenly go haywire? It’s not common for big companies, but for smaller outfits or solo freelancers doing pentesting, it’s a real possibility. So, to avoid any nasty surprises, it’s smart to have a backup plan - like having an alternative IP ready to go.
This is especially important if you’re working remotely - maybe you’re lounging on a beach or working from a local café and duty calls? In those cases, you probably don’t have a static public IP. One workaround is setting up a SOCKS proxy using SSH dynamic port forwarding on a cloud platform like Google Cloud or AWS, which gives you a stable public IP. This would serve as a jump machine to client’s network.
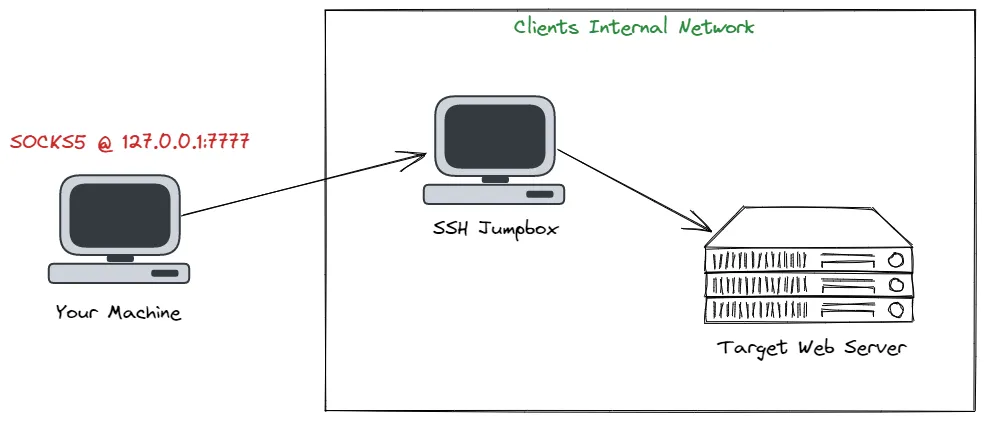 SOCKS Proxy Setup Sample. Image taken from Forwarding Burp Suite Traffic Through SOCKS Proxy.
The SOCKS protocol helps send data between two points using a middleman proxy. This creates a way for data to move between different places, like nodes or hosts, through a special tunnel. With SOCKS, you can choose which data goes through the proxy, giving you more control. Secure Shell (SSH) lets you set up a SOCKS proxy when you connect to a remote server. Plus, SSH encrypts all the data sent, adding extra security. So, by making a SOCKS proxy over SSH, your data can travel through the connection and come out at the other end of the proxy link.
I recently ran into this exact issue during a pentesting engagement for a web app. Our office’s IP was playing up due to a storm, so we quickly set up a lightweight cloud machine and used it as a proxy for our testing traffic. We then gave the client the public IP of that cloud machine to whitelist.
So, in this blog post, I’m going to show you how to set up your own backup proxy - and the best part? It won’t cost you a dime and is simple to setup.
Register and Setup a Cloud Machine
So, cloud providers usually offer free trials or credits, which is great because it means you can create and set up a virtual machine (VM) without spending any money. Note that each provider has its own way on creating a VM instance.
For this guide, I’ll show you how to set up an Ubuntu VM on Google Cloud Platform’s Compute Engine.
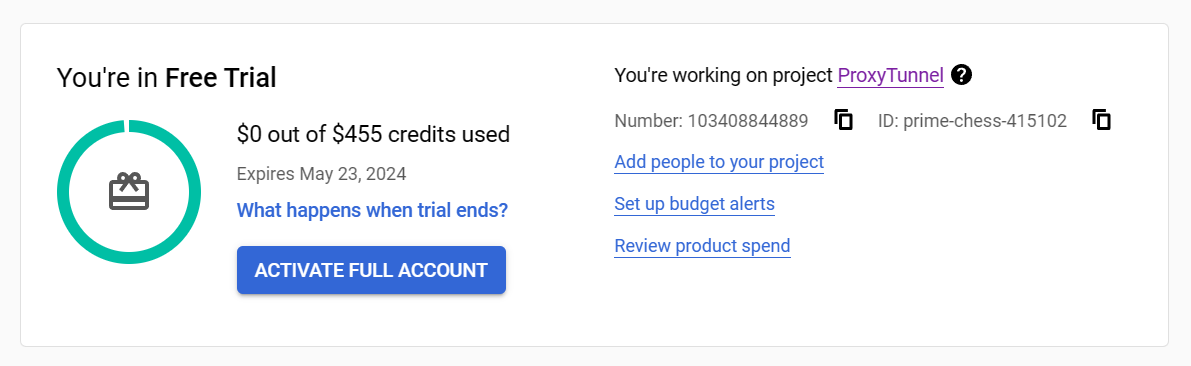 GCP Free Trial and Credits
You can follow these steps to create your VM: Create a Linux VM instance in Compute Engine
Get the Public IP
Remember to jot down the public IP assigned to your VM – we’ll need it later on. Also, this is what you’ll provide to your client for whitelisting.
 Public IP
Configure SSH Port Forwarding
Create SSH Key Pair
To make your connection secure, we need to create a key pair to use as SSH credentials.
We can use ssh-keygen or key generator tools you prefer.
1
2
3
4
ssh-keygen -b 2048 -t rsa -C "<your-gcp-username-or-email>"

# -b: bits
# -t: crytographic algorithm (dsa, ecdsa, ecdsa-sk, ed25519, ed25519-sk, rsa)
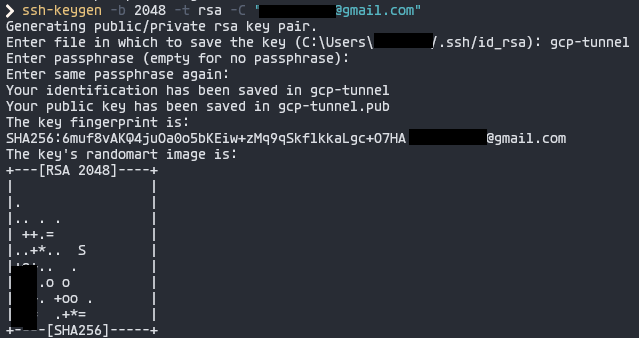 Creating SSH Key Pair
This will give you two files: <filename>.pub (public key) and <filename> (private key).
 SSH Key Pair
Add Public Key to VM SSH Keys
Open up your public key file <filename>.pub, copy its contents, and paste it into your VM instance’s SSH keys. Easy peasy.
On GCP, it looks something like this:
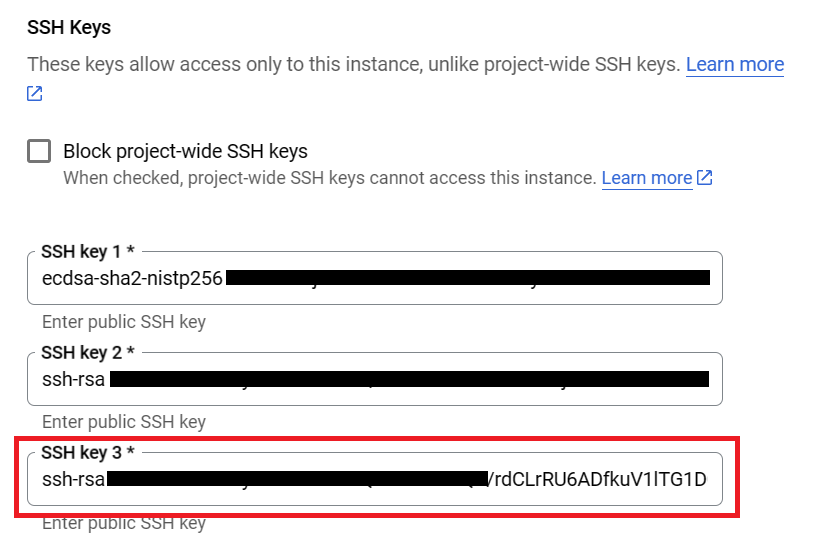 Add Public SSH Key
Start SSH Port Forwarding
On your computer, fire up your terminal and run this command to enable SSH port forwarding:
1
2
3
4
5
ssh -i '<path-to-your-private-key>' -C -D <port> "<your-email-or-username>@<your-public-ip>"

# -i: identity_file (e.g. private key)
# -D: Sets up a SOCKS tunnel over SSH on a specified port number
# -C: Compresses the data before sending it
I’ll use port 9999 in this example:
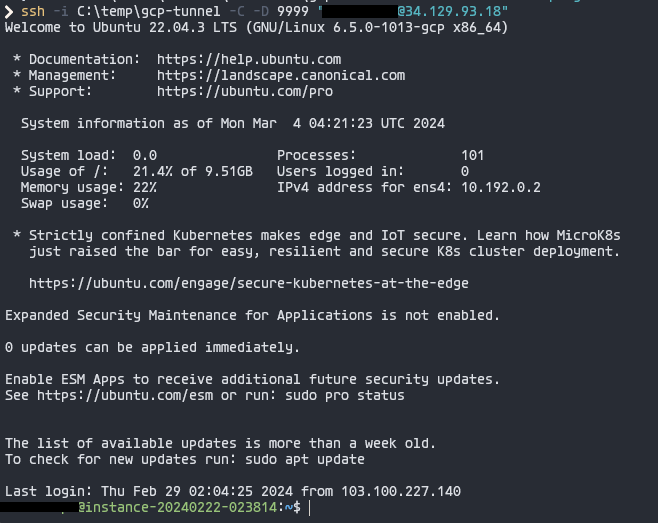 SSH Port Forwarding
Use SOCKS Proxy
Now that our proxy is up and running, let’s put it to work! You can use it for testing with your browser or tools like BurpSuite.
Browser Proxy
Set up your browser to use SOCKS with IP 127.0.0.1 and the port you chose for SSH Port Forwarding (mine’s 9999). I like to use FoxyProxy, but you can also do it manually in your browser settings.
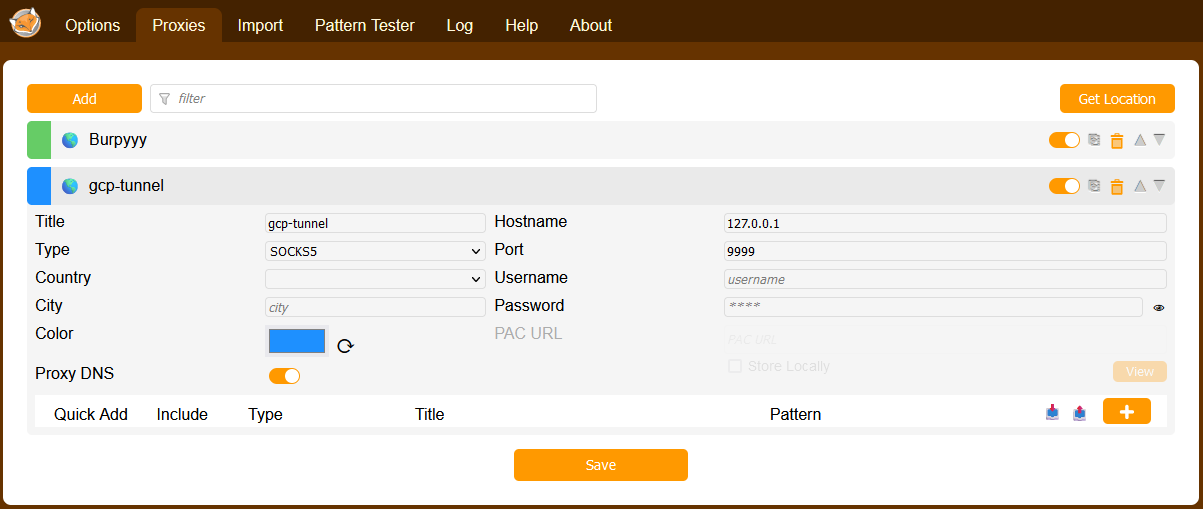 Browser SOCKS Proxy
Now, check your IP – it should match your cloud instance’s public IP.
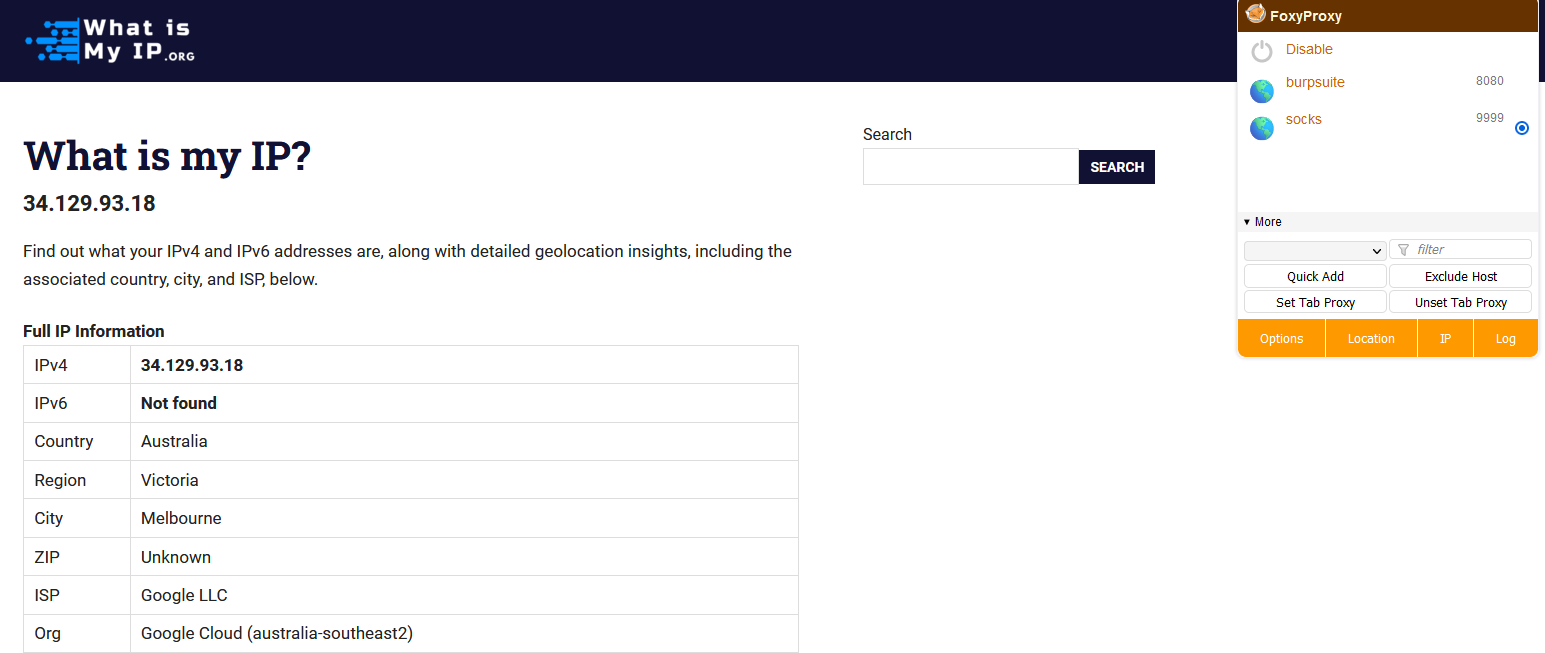 IP address for proxy enabled - Firefox
And it goes back to your original IP when disabled.
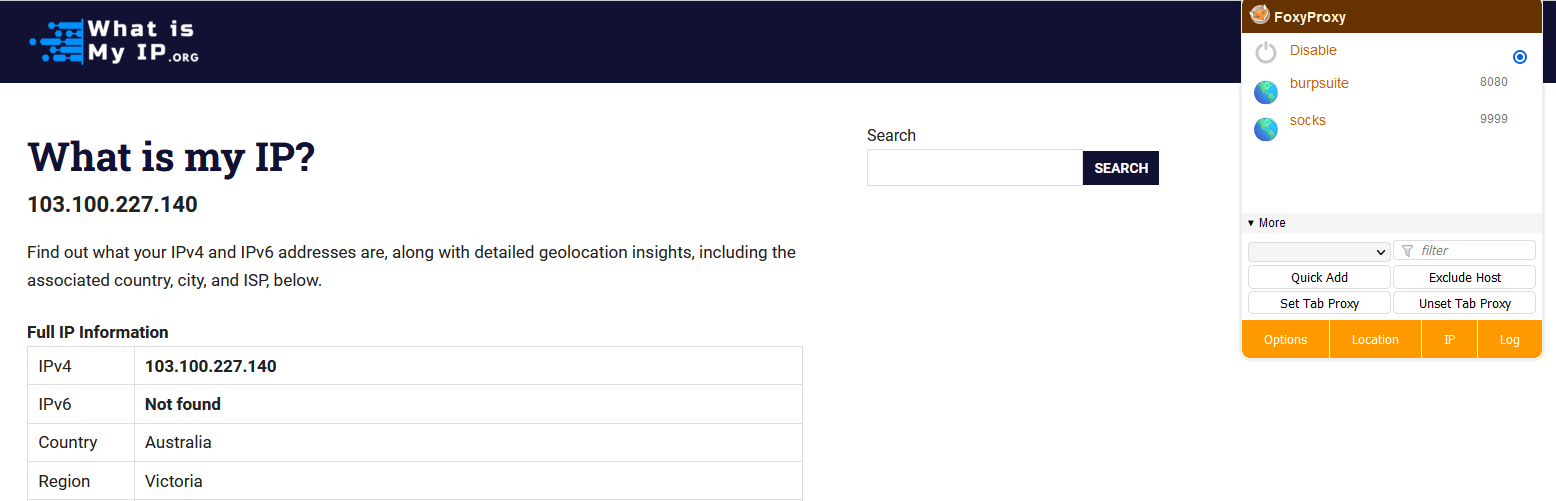 IP address for proxy disabled - Firefox
Burp Suite
Burp Suite is handy and commonly used for pentesting web apps. Just configure it to use SOCKS Proxy in the network settings.
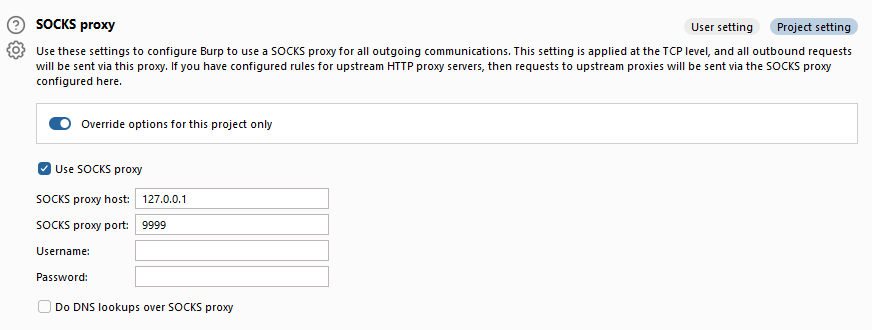 Burp Suite SOCKS Proxy
Now, you can intercept and tweak traffic.
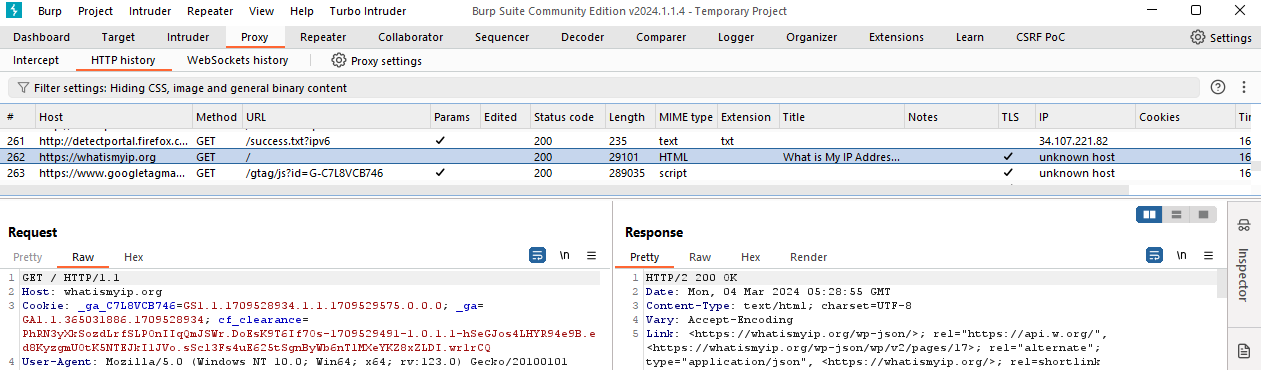 What is my IP Address? - Burp Suite
And there you have it! With everything set up, all you need to do is share the public IP with your client for whitelisting, then sit back, relax, sip your coffee, and get into your usual hacking (pentesting) routine.
Thanks for reading! Cheers!